Space Switch Tool 1.0 for Maya

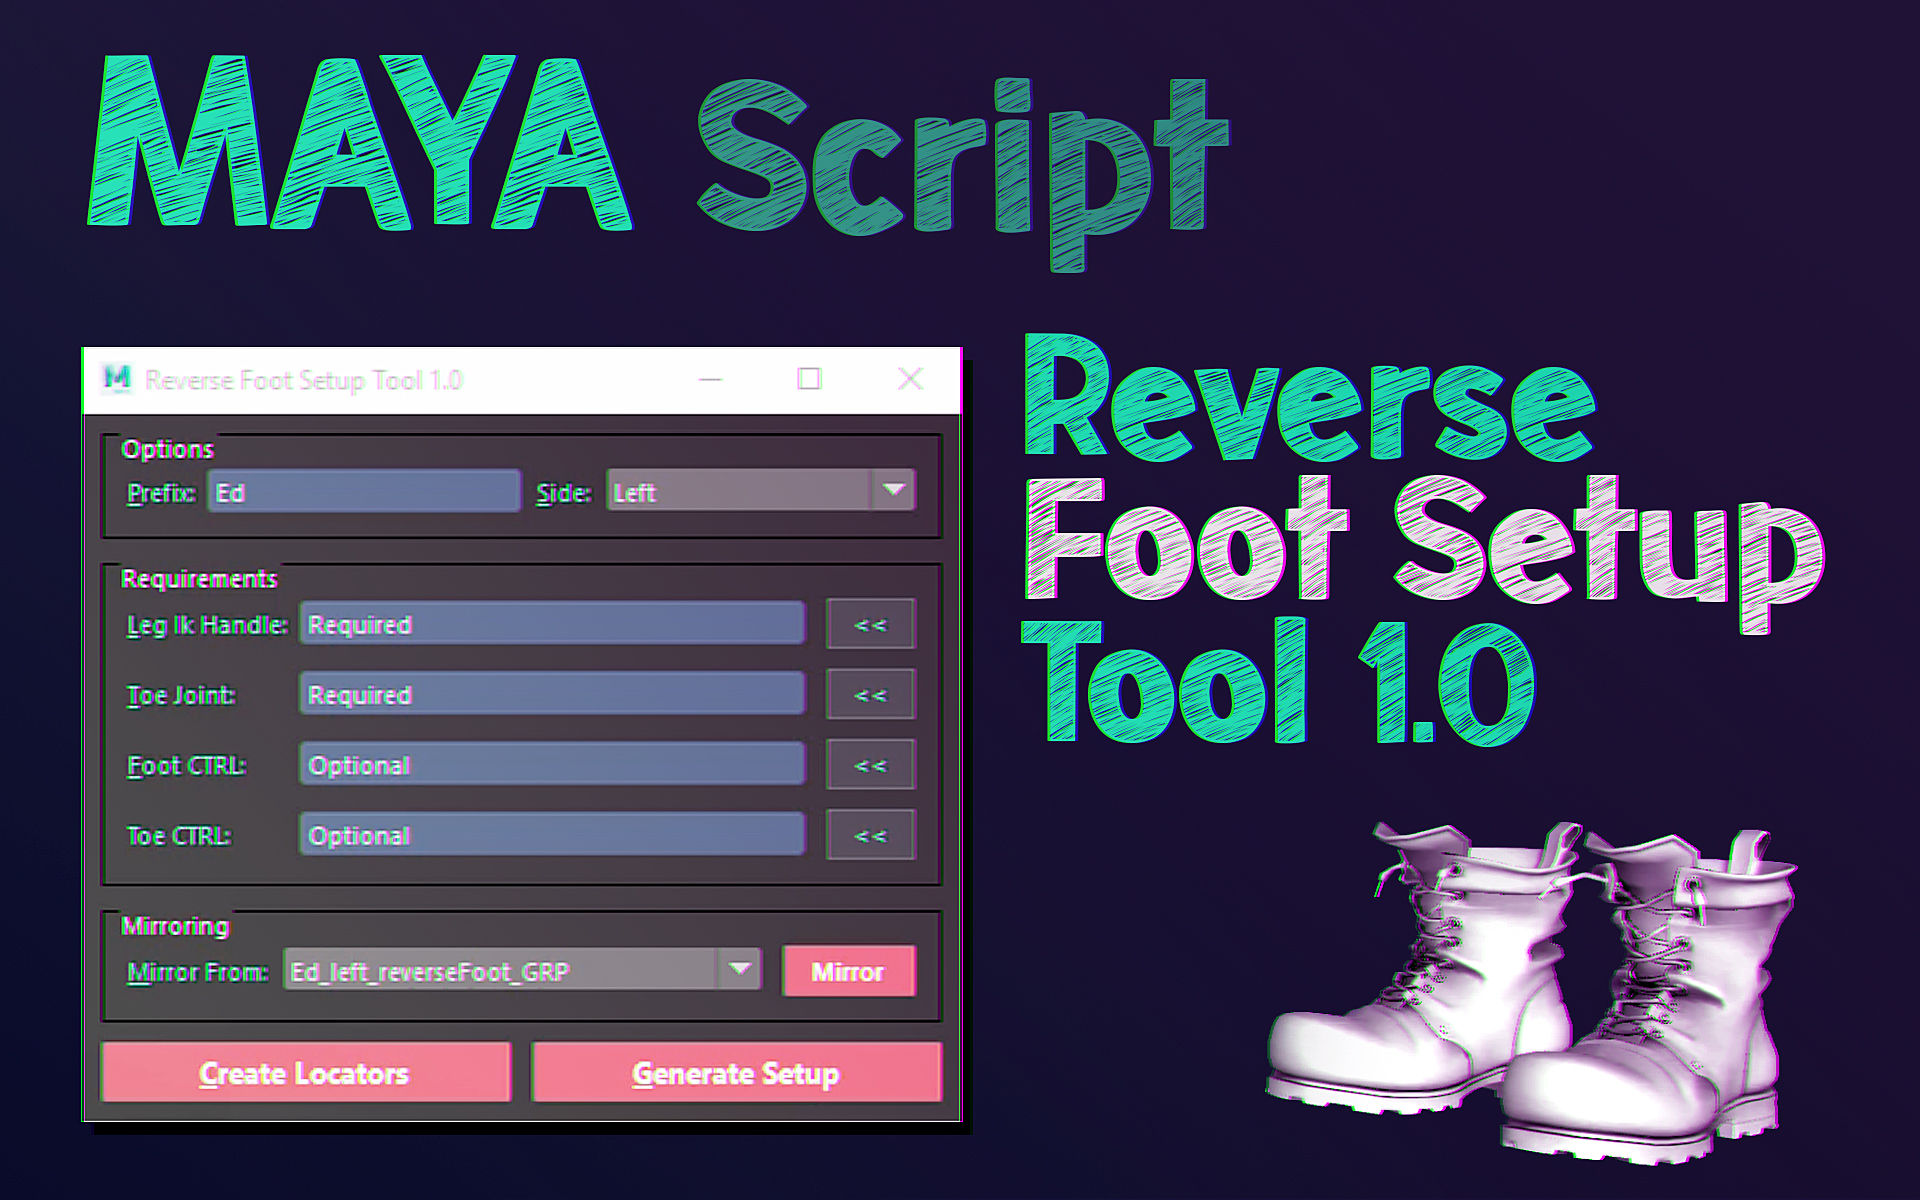
I think creating a space switch setup in Maya can be fairly easy if you know how to code. However, editing and debugging the setup can be complicated and needs a management system to handle the data.

I made this tool so it is both animator and riggers friendly. The UI is pretty interactive and the requirements for creating the setup are minimal. When adding a new space the tool guides the user by loading the previous made setup info to the tool.
The Marking menu provides a fast way to switch between spaces and executes a script to maintain the objects transformation when switching between spaces.
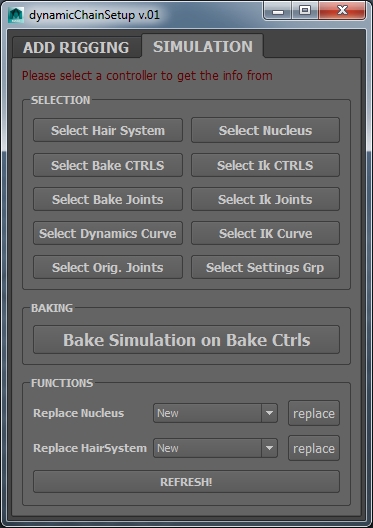
In the Edit and Debug tab you can view all the driver spaces and also edit their order and display names. You can even remove any of them or the whole setup cleanly if you want with out worrying about leaving some connected nodes behind in the scene.

For full explanation please check the tool's documentation page. Here is a quick video that covers most of the tool's functionality.

Reverse Foot Rig Tool 1.00 For Maya

Another Tool for Maya on cubebrush . I have been meaning to release this one for a while. Although it is very simple in concept this tool is very games setup and performance friendly since it doesn't alter your character skeleton and all its connections are done with Maya nodes(No expressions/No Set Driven Key Animations).  Also its ability to create a mirrored setup very fast is incredibly useful for mirroring animations.

For more info check the documentation

DynamicChainSetupTool is HERE

Happy New Year , I've finally finished the DynamicChainSetupTool I promised :)


DOWNLOAD HERE (Cubebrush link)

Maya versions: 2014 - 2018

Place the dynamcChainSetupTool folder in your scripts folder. Run these lines in a python tab in the script editor:

from dynamicChainSetupTool import dynamicChainSetup as dc
dc.show()


The tool is a simpler version of the tool I wrote for Crytek and showed in my demo reel.

In the Add Rigging tab you can build the rig with your choice of no. of controllers and a controller shape.

You can also give the rig a prefix, if you don't give it a prefix it will take the name of the start joint as a prefix.

In the nucleus and the hair system drop down menus, you will see a list of all nuclei and hair systems in the scene in case you want to use any of them for your rig.

If you create manually new nucleus or hair system while the tool is open just click refresh to add them to the drop down menus in the UI.

Now you are ready to create the rig, it is a very simple IK behaving like Fk setup. Remember you need ti keep the dynamic curve smooth for best simulation results.

In the Simulation tab, just make sure you have a controller selected and get the nodes that you like.

I don't know about y'all but the times Maya crashed on me trying to walk the attribute editor to select the hair system made me REALLY appreciate this tool.. this is honestly my favorite part about the whole thing.

Another functionality is the baking rig, there you can bake the dynamics simulation onto controllers. Then you have that simulation as animation curves.

This will allow you to fix some collision problems, add another animation layer or make the animation loop-able for a game animation.
All of this without breaking the dynamics rig, which would happen if you bake results on the joints.

In the functions section you can assign an existing or new hair system or nucleus to you rig. 

I hope you enjoy the tool, I will really appreciate if you let me know how it works for you. If you have any questions or problems using it, feel free to post here. Thanks!
 

Ik Spline Advanced Twist Controls - Tutorial

Hello everyone,

I thought I would share some info on the Ik Spline Advanced Twist Controls since I found a few questions about it online and also our new riggers were kind of confused about it 

There are many ways to setup the twist along a spline IK joint chain.. Based on the character you are rigging you can choose what is best for you.

This tutorial assumes you are already familiar with the spline Ik setup and will be focusing only on the advanced twist settings.

First of all, if your aim axis along the joint chain...


Read More